Tag Archives: urban foraging

Recipe: Beautyberry Flour

20160911_134051

Once you meet the wonderful beautyberry, not only will you never forget it, but you’ll begin seeing it everywhere! It’s quickly becoming popular in landscaping due to its natural hardiness and lack of maintenance. It also is important for local wildlife as it provides Winter forage when many other foods are gone.

Many people have tried making beautyberry jelly before, and it is amazing. We feel that if Autumn were to have an official flavor, it would be beautyberry jelly. However, we decided to take our love of beautyberries to next level.

A source of wild carbohydrates, they can taste mildly astringent when raw. But, we wondered if “maturing” them, the sugars that is, in a dehydrator would have the same effect as with other fruits like wine grapes and persimmons. Well, we were right!

Not only that, beautyberry breads are rather light and fluffy with a decidedly rich, chocolate taste.

To make this amazing stuff, simply gather as much beautyberries as you want (and after tasting it, you may want a lot!). Puree your berries in a blender with a little water to get things going. Transfer this slurry to your dehydrator and leave on medium low until the berry puree is brittle and dry.

20161209_181822

Afterwards, remove the crisp, cracker-like stuff and place in a food processor. Start the processor and grind it until it’s a fine powder.

You can store it in any tupperware or other container, but I would recommend storing it in the fridge, due to the sugars present.

20161124_134310

Beautyberry flour is great for making brownies, cakes, muffins, even a seasonal Yule log or cookies!

Recipe: Tabbouleh

20160814_205320

Tabbouleh, for anyone who’s tried it, is an amazing side dish or even a meal unto itself! It’s very cool and crisp, perfect for relaxing during warm, sunny evenings. Tabbouleh is a great recipe to try out different wild greens and other veggies, while still enjoying the fresh garden vegetables many of us are accustomed to.

The main ingredient in tabbouleh, traditionally, is bulgur, a product of different wheat cereals. We decided instead to use a wild semi-grain called amaranth. Amaranth leaves are powerfully nutritious green, but their seed heads are also wonderful and very similar to quinoa. Collecting the seed is very simple: bend the ripe (turning brown, from green) seed head inside a paper bag and shake! A single plant can produce thousands of tiny seeds. We’ve made this dish with both quinoa and amaranth, but you can easily omit one for the other.

For this recipe, you’ll need:

1/2 cup rinsed quinoa

1 cup amaranth seed

1/2 tsp salt, to taste

2 tbsp lime juice

2 cloves minced garlic

Couple dashes of black pepper

1 large cucumber, diced into 1/4 inch pieces

1 pint cherry tomatoes, halved

2/3 cup chopped parsley

1/2 cup mint

2 thinly diced scallions (or wild onion stems)

1/2 cup extra virgin olive oil

Boil the quinoa and/or amaranth with the salt in 1 cup water on high heat. Reduce the heat and let simmer for 10 – 15 minutes, until tender. Remove from heat and fluff with a fork, then set on a large sheet to cool.

Whisk the lime juice and garlic in a small bowl, then slowly whisk in the olive oil and season with salt and pepper to taste. Transfer the amaranth and quinoa to a large bowl and mix in 1/4 cup of the olive oil dressing. Next add the cucumber, tomatoes, scallions and herbs. Toss together and season with salt and pepper. Finally, drizzle the remaining dressing on top.

-Enjoy!

Recipe: Wild Pizza

pizza

Pizza, similar to pancakes, is a very versatile dish. Thick crust, pan crust, deep dish, margherita, etc. This can allow a wide variety of experimentation with different types of flours and different cooking methods. Not to mention different ingredients! Our favorite uses a Prickly pear barbecue sauce of our own invention. But we also enjoy using all the wild veggies which grow around our home: from purslane and amaranth to wild onion and curled dock.

To make a basic Wild Pizza, start with:

2 cups of acorn flour, other nut flour or any alternative flour….

2 tbsp of coconut oil or butter

2 large eggs

1/2 tsp of salt

Garlic, basil, oregano or other seasonings as desired

-Start by preheating your oven to 350 degrees.

Line a baking sheet with parchment paper. In either manually or in a food processor, mix all the listed ingredients together until a dough forms. Compact this dough into a ball and then place between two pieces of parchment paper and roll it out until it is about a quarter of an inch thick.

20160903_204255

Remove the top piece of parchment paper and transfer the the rolled dough from the parchment paper to the pizza pan. A good idea is to poke it a few times with  a toothpick to prevent bubbling from occurring. Bake for about 15 – 20 minutes, until golden.

Once your crust is finished baking, begin topping your pizza with the sauce you’ve chosen, followed by good mozzarella. Next add whatever meats or veggies you desire. We like pickled onion flowers and diced onion stalks as well as amaranth leaves and purslane stems. A final layer of mozzarella finishes it off.

20160824_190728

20160824_190643

Place back into the oven for another 10 – 12 minutes, until it begins to bubble.

20160903_211940

-Enjoy!


Recipe: Pancakes!

20161003_193510

Nearly everyone seems to love delicious, fluffy pancakes. But I bet you didn’t know you could make them out of a wide variety of different ingredients too! We’ve made pancakes out with acorn flour (my favorite), mesquite flour, cattail pollen, and more.

Because they’re so simple, pancake recipes are really versatile. Eggs, flour medium or substitute, maybe some baking powder and a little water or oil. The one word of caution I will say, be mindful of the sugar content of the medium you are trying to cook with. Beautyberry flour is very sweet, but as a result, that sugar caramelizes and burns too quickly for pancakes. By the same token, blackberry or any other fruit flours wouldn’t work either. Unfortunately…

To make a small batch of pancakes, I usually use:

1 cup of “flour”

2 eggs

1-2 tbsp baking powder

Dash of almond milk or other liquid, to improve fluidity

Whatever copious amount of various toppings or syrups your wild heart desires….

First I mix together all the ingredients listed above in a mixing bowl. Depending on the flour you’re using, you could add vanilla extract, or cinnamon, nutmeg or other flavorful spices to give your breakfast a little more jazz.

20160902_075124

Next I transfer this mixture to a spouted measuring cup, for easy pouring into the pan or griddle. Which, speaking of, I would then turn onto medium heat and add a couple spoonfuls of olive oil to.

Once the pan is nice and hot, pour your first pancake. Try to keep it a little smaller, so you can get a better feel for how different flours behave. Flip ’em once, feeling to make sure they’re cooking all the way through. Once your heat builds up, it won’t takr long at all for each one to finish. Some materials will cook faster than other, though. Cattail pollen being the fastest.

pancakes2

As you finish them, or once they’re all done, choose whatever hellacious toppings you can think of. Acorn pancakes I like to top with applesauce and dried beautyberries. Mesquite or cattail pancakes are good with honey, or jelly. Mesquite-jalapeno jelly is particularly wonderful with cattail pancakes, but then it’s wonderful with everything honestly….

pancakes

Have fun!

Recipe: Beautyberry Spice Cake

20161012_194529
Ladies and gentlemen, may I humbly introduce, Beautyberry flour.
That’s right, you heard me. For those of y’all familiar, that wonderful, native shrub you’ve got growing beautifully in your yard or garden that all the songbirds love, those berries aren’t just good for eclectic jams. For those of y’all unfamiliar, this plant grows EVERYWHERE! Its amazing, its tasty, its  got carbs, its leaves are an actual mosquito repellent, did I mention carbs?
If you’ve experimented or tried the jelly, beautyberries have an amazing, sweet flavor that is best described as the very incarnation of Fall; sweet with an underlying spice and a hint of nuttiness and something you just can’t quite describe. More and more, we’re finding that’s the case with wild foods. Flavors and tastes that just don’t compare, that you just can’t describe.
This recipe can be used to make either a whole spice cake, or muffins/cupcakes if you’re desiring something frosted! We don’t recommend using it for pancakes however, the suger content of beautyberry flour is so high that it burns and sticks to the pan, much to our sadness….
What you’ll need is:
2 cups beauty berry flour
2 tbsp. baking powder
4 large eggs
1/4 cup milk
1 tbsp. cinnamon
2 tsp. allspice
1 tsp. clove
pinch salt
3 tbsp. brown sugar (white works, but flavor depth is better with brown) – also we like a cake that isn’t as sweet, so up your sugar if you want more of a dessert like confection.
1 tsp vanilla
2 tbsp. cooking oil
Preheat your oven to 350 degree. Whisk eggs until combined, being careful not to over mix (this may toughen your final product if you over mix your protein). Mix in the remaining wet ingredients.
20161104_173427
In large mixing bowl combine all dry ingredients, ensuring even distribution. Pour your egg mixture into the flour and combine well; you will have a batter, consistent with a thick muffin batter.  Add milk as needed to get to this point. Alternately you can whisk your egg white separately until soft peaks form and then fold them in as the last ingredient.  This will help give a fluffy product, but the end result is delicious either way.
Pour into greased muffin tins or a small loaf pan. For muffins bake 12-15 minutes and for a loaf bake 30 – 35 minutes.  A cake should appear dry on top and should give with a light touch, but should not have movement; spongy is the texture you are looking for.
Don’t expect a high rise, these aren’t going to make huge grocery store muffins, but they will pack rich flavor into each bite.  They’re perfect paired with coffee in the morning, smothered in prickly pear barbecue sauce with carnitas for dinner, or with vanilla bean ice cream as dessert.
 It’s a little black dress. Lol!
-Enjoy!

Recipe: Stuffed Nopales

20160928_201328

If you’ve tried our cactus fries recipe, you already know that cactus pads, or nopales, have an amazing, lemony flavor. Here’s another way to enjoy them, stuffed or topped with your favorite Southwestern ingredients!

Traditionally, the pads are grilled outside, typically on a warm Summer evening! But they can be cooked on the stove as well, either in a cast iron or other skillet.

What you’ll need are:

3 – 5 cactus pads (Opuntia spp.)

Mozzarella, or another queso

2 tomatoes

1 onion

2 – 3 medium sized avocados

1 – 2 pounds of ground beef (or turkey, chicken, carnitas, so on)

Assorted seasonings; camino, cayenne, salt, pepper, etc.

First, clean and de-spine your cactus pads in a sink, under running water. Then begin browning the ground beef (or other meat) and mix in the seasonings or sauces of your choice. While the meat is cooking, dice up the tomatoes and the onion and mix them together in a bowl. Skin and slice up your avocados.

For larger pads, you can slice into them, turning them into cactus pockets. For smaller pads, they’re just as good topped with all the ingredients instead of stuffed.

Once the meat is done cooking, take it off the heat and place your cheese either in or on top of your cactus pads. Add the warm meat quickly for gooey-cheese effect! Next add the tomatoes and onion and top with avocado slices.

Enjoy these with friends, in the beautiful twilight around a fire, and watch the stars come out!

Recipe: Acorn flour

Acorn flour is more complicated than mesquite or beautyberry flour, but still relatively simple. There’s no chemistry or special procedures needed, it can just take a little longer. That’s why it’s good to do in bulk and then store the flour for later use.

20160902_074428

Before you do anything else, you have to gather up a bunch of acorns of course. And not all acorns are the same. Some are bigger, some are smaller. Some are sweeter, some are more bitter. Generally, but not always, the bigger the acorn, the less bitter it is (it also has to do with the species of oak tree). It’s this bitterness that we want to get out of the acorns before we make them into flour.

20161029_100843

First you’ll want to crack them open and chop the meat up into smaller pieces. Then toss them into the blender, just like making mesquite flour, and grind them up. It helps to add some water to the blender, to ensure they grind up easier. Next take the slurry mix and pour it into a large glass jar; an old pickle jar will do perfectly. This jar is where making acorn flour takes the longest. Let your ground up acorns sit in the jar in your fridge and leach their bitterness into the water. Everyday, pour out the coffee colored water in the jar and re-fill with fresh water from the tap. Give the jar a good shake to mix things back up and stick back in the fridge.

This process, depending on the type of acorns, can take a few days to a week or more. The acorns are done leaching once the flour no longer tastes bitter. Generally, “white” oaks are less bitter and take much less time, while “red” oaks can take much longer. While technically a “white” oak, live oak acorns can be so bitter, as to not be even worth the trouble. We get all our acorns from burr oaks; a moist soil loving “white” oak variety with the biggest acorns you’ll ever see.


After the flour is done leaching, simply pour it through a cheese cloth or other clean rag to squeeze the water out and place in either a dehydrator or on a cookie sheet in the oven at the lowest temp to dry. Once dried, run back through a blender or other grinder to bring to a fine, floury consistency.


20161122_082303

Although acorn flour can take some time, acorns are full of protein and healthy oils and fats. Preserving these oils into the final flour, by using this cold-leaching method, allows these oils to act like a binder when making acorn pancakes or pizza or muffins etc.

Recipe: Spring Chicken Stir fry

red2

Stir fry has to be one of the most versatile methods of eating odd arrays of different ingredients. As such, it probably comes across as rather lazy most of the time. However, when the right ingredients are specifically chosen to compliment and enhance each other, a good stir fry can be a work of art.

Or perhaps I’m foolish enough to think so. Either way, here is a recipe for my own Spring Chicken! Especially during the early Spring, you can put together an amazing compliment of flavors and ingredients. So often, people assume wild greens will all taste bitter. While some do, there are a many that taste more mild and some that even taste sweet or tart!

This dish uses both rich starches and more citric tasting greens and flowers. The perfect dish to welcome back Spring!

Chicken breast

Wood sorrel (Oxalis spp.)

Wild lettuce (Lactuca spp.)

Canna roots (Canna indica)

sliced Wine cup roots – outer skin removed (Callirhoe involucrata)

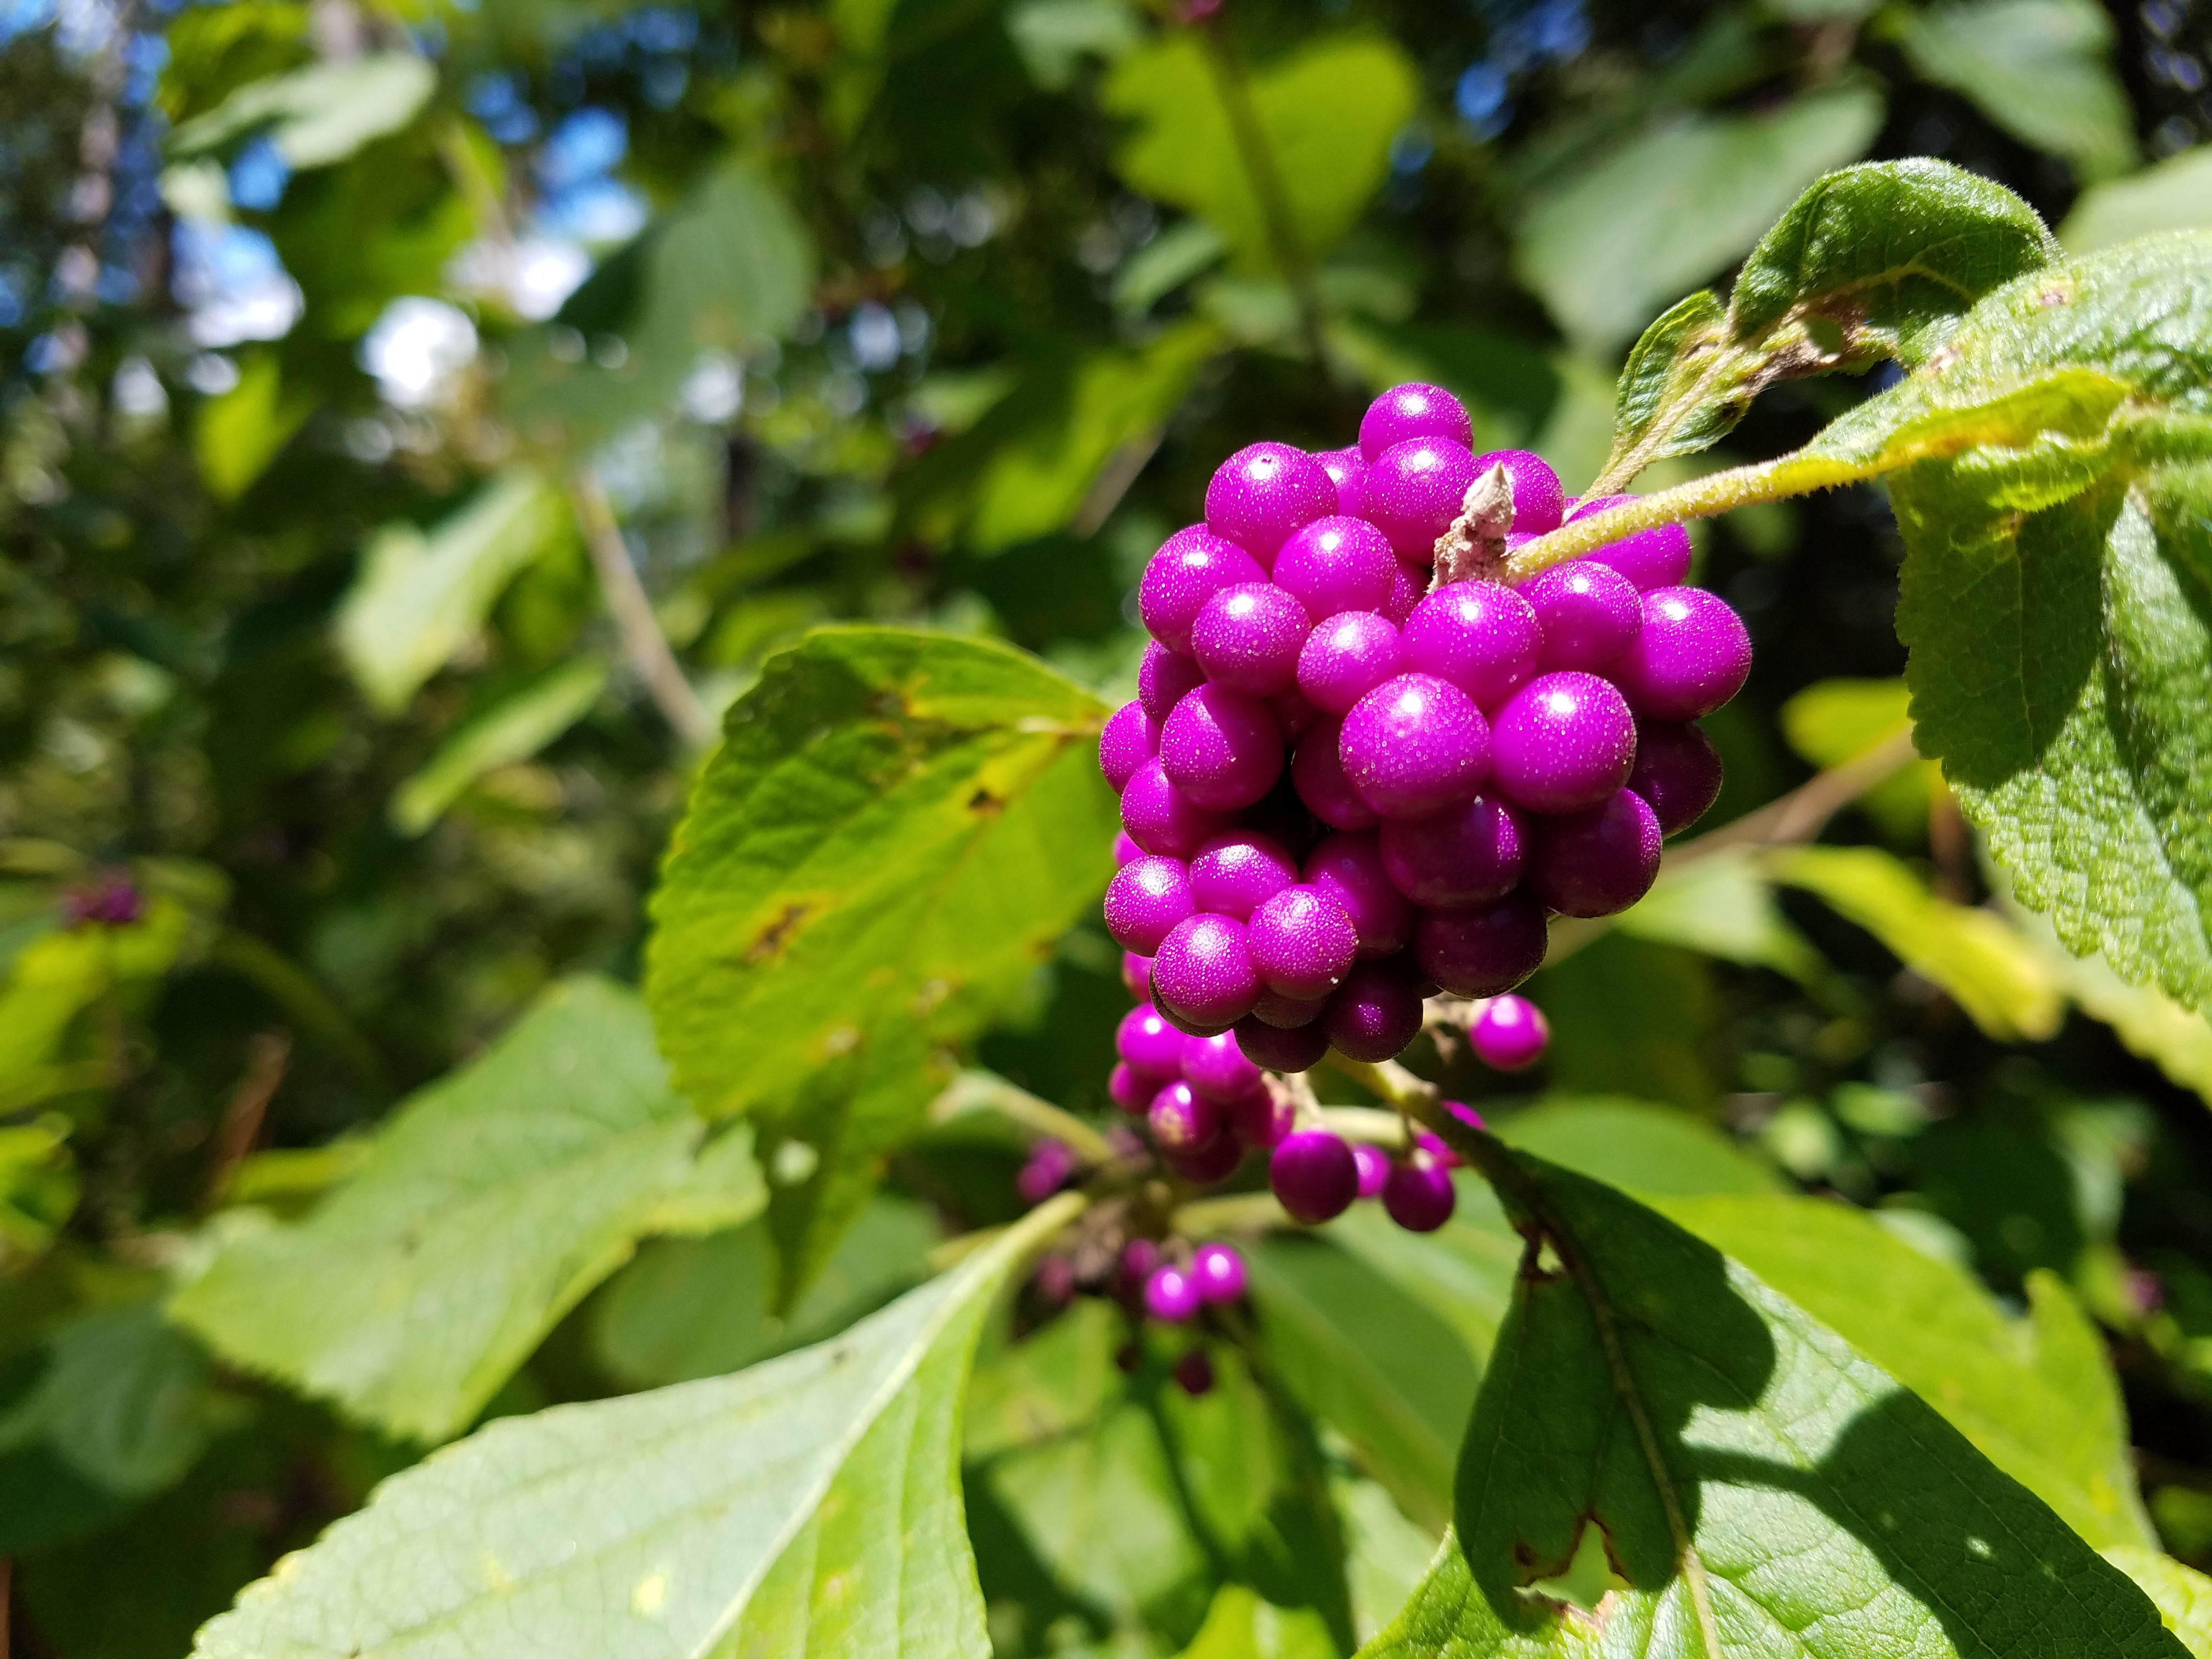
Red bud flowers (Cercis canadensis)

cooking oil

soy sauce

salt, pepper, other seasonings to taste

Yes, there is such a thing as wild lettuce, and believe it or not, it is native to North America. It’s loaded with vitamins and minerals though and has a somewhat bitter taste as a result. However, wood sorrel balances that perfectly with a lemony, almost tart flavor that you’ll never forget. Both of these plants can be found in early to mid Spring in moist woodlands, usually along the edges (or just inside) where bursts of sunlight still reach through.

Red bud is a special tree. Its flowers have a subtle, sweet flavor that makes them amazing as a garnish for many dishes or added to salads. It’s actually the state tree of Oklahoma, and like the dogwood, one of the first trees to come back into bloom in the Spring. You can usually glimpse it driving down wooded highways in late February or early March; its red blossoms a stark contrast to the barren limbs all around them. You can also find them commonly planted in city parks or commercial areas as an ornamental, and these are the easiest trees to gather from.

Canna lily is usually found growing in peoples’ gardens but, being a native, can also be seen returned feral to the local environment quite often. Its rhizomes have one of the highest starch contents in the world and it is a delicious vegetable similar to water chestnuts. Wine cups are a rather unknown phenomenon, however. To be sure, many gardeners have struggled with removing their spidery tendrils, and some may have even noticed their large, central tap roots. Few will have ever thought to try eating them however! With their brown outer skin removed, they have a rich, bland, fresh crunch that has a mildly nutty after taste.

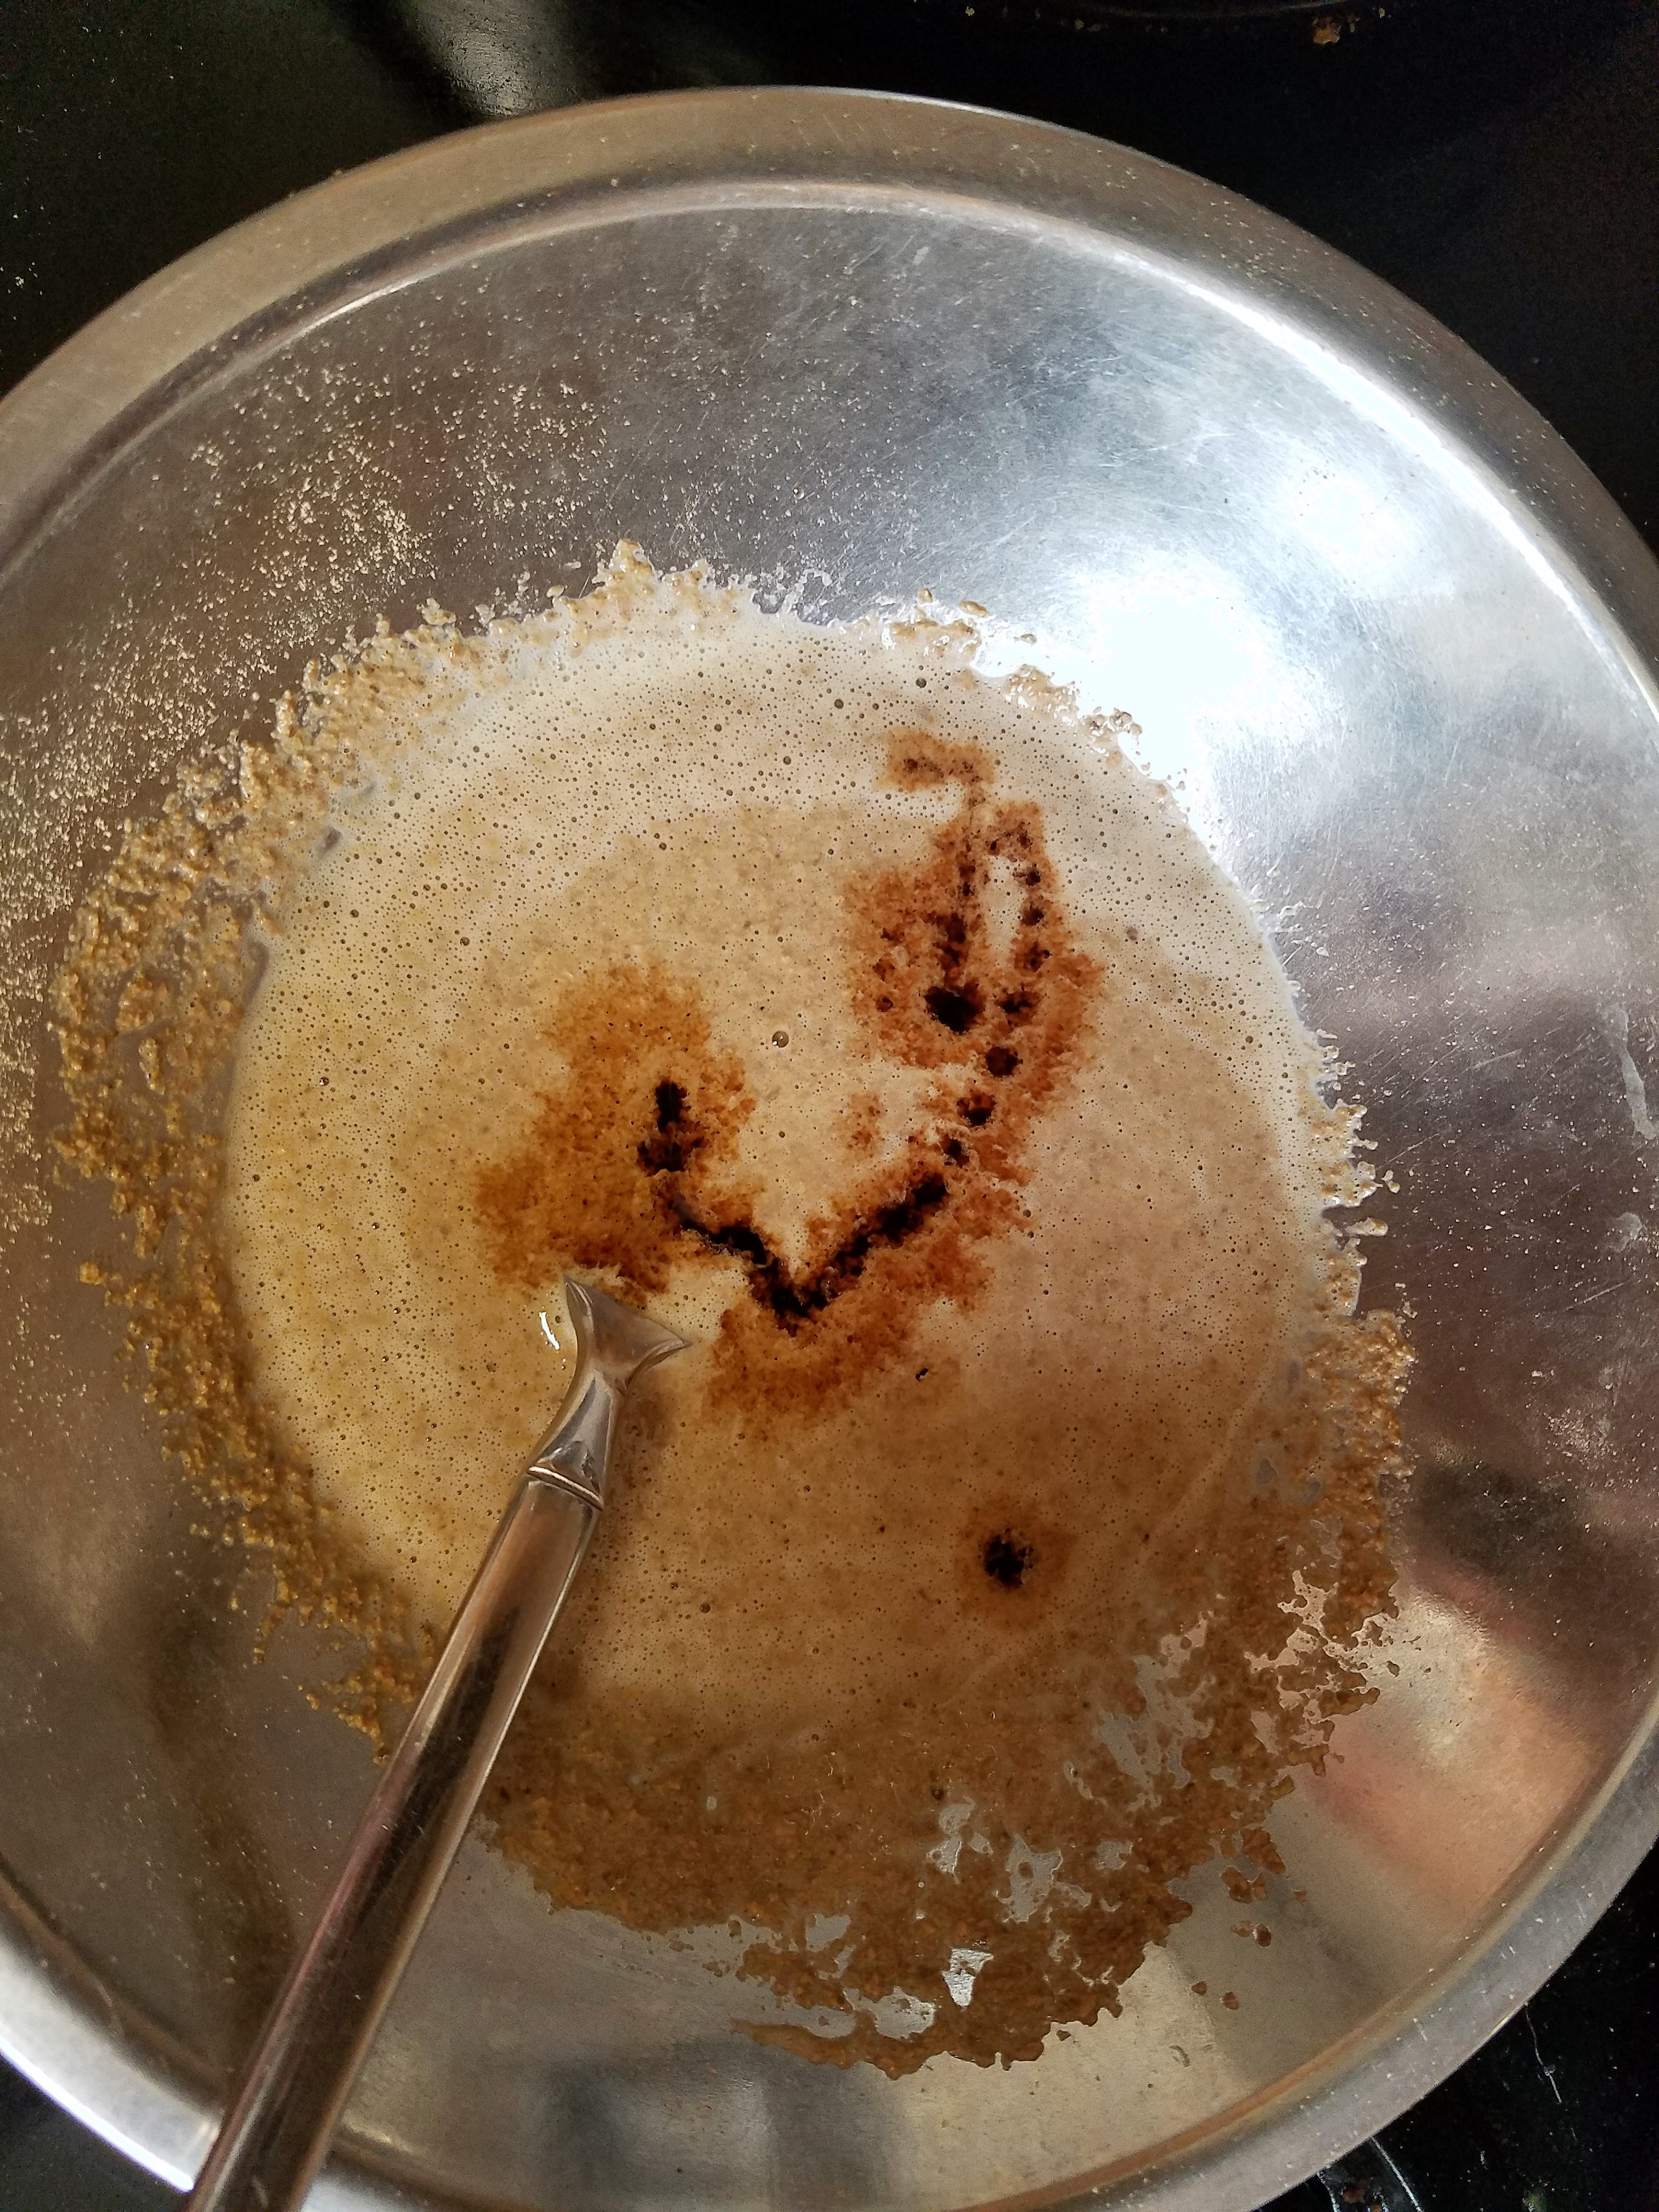
In a medium sized skillet, pour the cooking oil, soy sauce, canna roots and cut up chicken breasts. Add a dash of salt and pepper or any other seasonings you prefer at this point. Once the chicken begins to cook thoroughly, lower the temperature and add all the leafy greens. Saute the chicken, canna roots and greens until the greens begin to wilt and add the sliced wine cup roots, then turn the stove off. Finally, add the red bud flowers as a garnish while residual heat is still present.

Enjoy!

red

Recipe: Cactus Fries!


20160831_091755

Cactus, or nopales, are one of the most unexpectedly delicious foods we’ve encountered. With a juicy, lemony tart flavor and a nice crunch, young cactus pads are a wonderful addition to any salsa or guacamole or salad.

There is, however, another way to enjoy these gifts of the arid, sandy savannah: FRIED!

Similar to okra in texture, once we’d tried wild nopales, we knew exactly what to do with these xeric delicacies. The ingredients you’ll need to whip up your own batch of cactus fries are as follows:

3 to 4 small or medium sized young cactus pads (Opuntia spp.)

3 cups flour

2 eggs

1 tblspoon garlic

2 tsp. salt and pepper

smallest dash of almond (or other) milk

cooking oil

Under a faucet, scrape/cut off any small hairs or glochids growing on the young cactus pads. Picked young and fresh enough in the Spring, your pads should have little to no hairs on them yet; these are the tastiest ones too! Cut the pads into strips about 1/4 inch wide. In one bowl mix the flour, salt, pepper and garlic. In a separate bowl, mix the eggs and whatever milk you prefer.

In a frying pan, heat up about 1/2 to 1 inch of cooking oil on medium high heat. As with frying most things, you may need to add more oil later on. As you’re frying, also watch the temperature; you may need to lower it if the cactus is browning too fast.

Working in small batches dredge your cactus slices in flour, then dip into the egg mixture, and then again in flour mixture.  I like to do the process a few at a time, and then set on a jelly roll sheet, or any flat surface until i’m ready to fry one full batch.  It’s also best to prep your next batch as you fry your first.  Flip over cactus fries once they are browned and crisp on one side.  It can take anywhere between 2-5 minutes depending on your stove top, just be patient and remember to keep checking, adjusting heat as needed.

20160826_210802

We’ve found that they’re best served with honey mustard.  We like to mix honey, with spicy or regular mustard, and the smallest splash of water.

Enjoy!

Recipe: Blackberry Mesquite Cobbler

cobbler2

My Grandmother made the most amazing blackberry cobbler I’ve ever had. This is not her cobbler, but it is also amazing.

We made the crust out of a mixture of mesquite flour and chopped pecans. The blackberries we picked with our friends next to the forest by our home, right here in Bryan, Texas.

Ingredients:

  • 1.5 cups mesquite flour
  • 1.5 cups chopped pecans
  • 1 stick soft butter
  • 2 – 3 cups blackberries

cobbler8

cobbler7

In a food processor, chop up the amount of pecans to be used. Next, bring your oven to 400 degrees. Combine the chopped pecans with the mesquite flour and butter; form it into a dough the resembles a graham cracker crust. Press 2/3 of the dough into the bottom of a greased pie plate. Next, fill the remainder with fresh or frozen blackberries! Carefully roll out the remainder of the dough between two pieces of wax paper. Cut this into strips and lay them “decoratively” across the top of the cobbler.

cobbler3

cobbler5

cobbler6

cobbler4

Bake in the oven at 400 degrees for 30 minutes, or until the edges start to darken. The blackberries should be bubbling.

cobbler1

This dish is best fresh, of course, but it does go well with yogurt (or ice cream?!) or even for breakfast with almond or hackberry milk! There’s no added sugar, and all the ingredients are extremely healthy, so while this is obviously a dessert, there’s no reason not to indulge and enjoy it!

20160712_202555